Manual Leather Cutting & Embossing Press: Adjustable Stroke
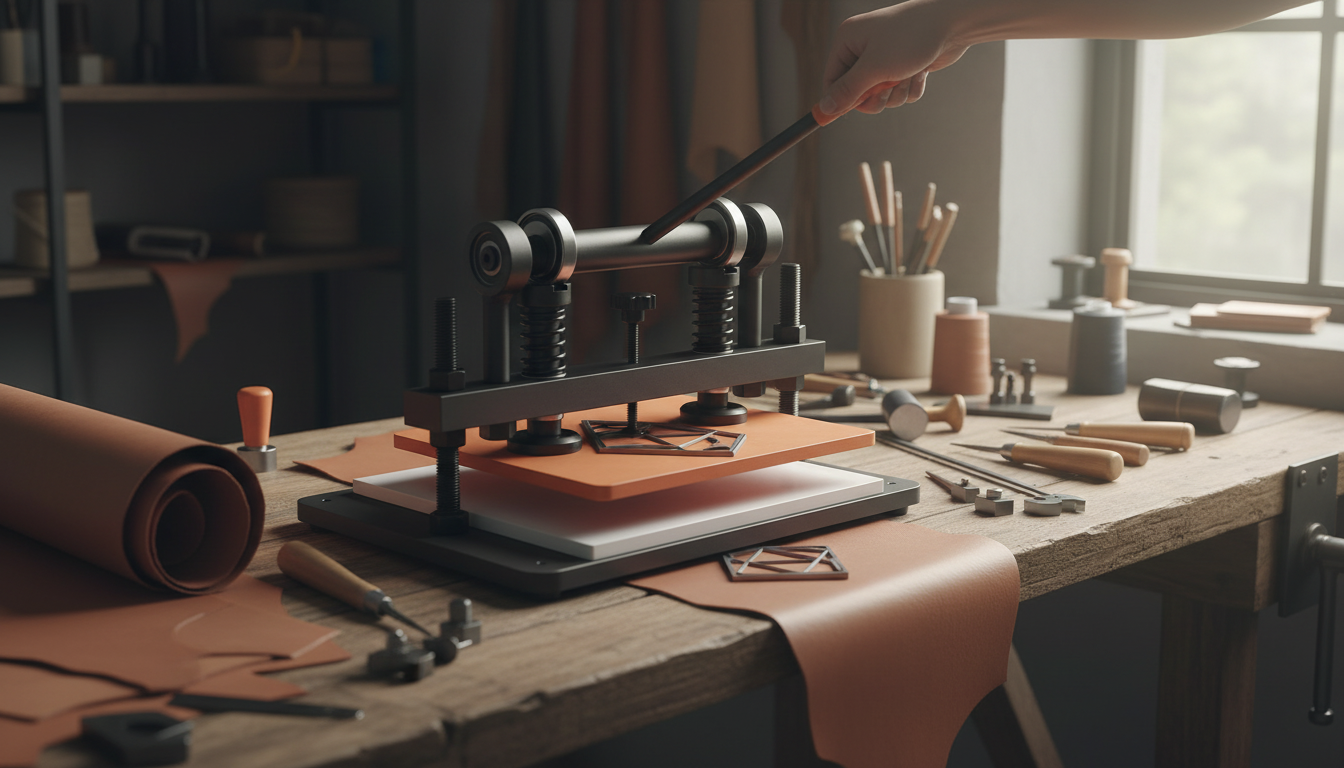
Leather Cutting & Embossing Machine with Adjustable Pressure Stroke
A manual die cutter with adjustable pressure and stroke makes it easier to get clean cuts and consistent embossing without relying on electricity or a complicated setup. With the right die, backing surface, and a few quick adjustments, you can move from one-off prototypes to small-batch production with repeatable results. Below is a practical guide to how this style of press works, what matters most in daily use, and how to dial in settings for different leather types and thicknesses.
What This Manual Die Cutter Does
- Cuts leather cleanly using steel-rule dies and controlled press force.
- Embosses patterns and logos with even pressure across the plate for a more uniform impression.
- Adjustable pressure and stroke help match the press action to your material thickness and tooling stack-up.
- Manual operation provides predictable control for small workshops, studios, and prototyping.
Who It’s Best For
- Leathercrafters producing wallets, straps, key fobs, patches, and small goods where repeatability matters.
- Makers who want consistent results without moving up to a motorized cutter.
- Studios that switch between cutting and embossing and need quick, straightforward adjustments.
- Beginners who want a simpler workflow than hydraulic or pneumatic presses.
Adjustable Pressure and Stroke: Why It Matters
Two adjustments drive most real-world results: how hard the press contacts the stack (pressure) and how far the press travels (stroke). When both are tunable, you can adapt to changes in leather thickness, die height, and backing materials without “guessing and forcing” your way through the job.
- Pressure control helps prevent under-cutting (fibers still attached along the edge) and over-pressing (crushed grain, distorted surface, or over-deep embossing).
- Stroke adjustment helps align press travel with different setups—like thin veg-tan for crisp embossing versus thicker stacked leather for cutting multiple layers.
- Better consistency when alternating between different die heights, embossing plates, or backing pads.
- Less waste and fewer test presses once settings are dialed in for a given material and tooling stack.
Typical Workflow for Cutting and Embossing
1) Prepare the leather
Start with a flat, stable piece and a clean work surface. For vegetable-tanned leather, embossing usually benefits from the right moisture level (often lightly cased) so the impression forms cleanly without tearing or cracking.
2) Set and align the die or plate
Place the steel-rule die (for cutting) or the embossing plate (for imprinting) squarely, then align to grain direction if appearance matters. For repeat jobs, add reference marks so the design lands in the same spot every time.
3) Choose the backing surface
A proper cutting pad or backing plate supports clean edges and helps protect tooling. If the backing is gouged, too soft, or unevenly compressed, the press may cut cleanly in some areas while leaving “hangers” in others.
4) Adjust stroke and pressure gradually
Start lower than you think you need, test on scrap, and increase in small steps until the cut fully separates or the emboss reaches the depth you want. This approach is faster than it sounds because it prevents over-pressing and reduces troubleshooting.
5) Press with steady, even force
Apply smooth, controlled pressure. Sudden jerks can shift a die, leading to double impressions or a cut that drifts out of alignment.
6) Inspect and refine before production
Check edge quality and impression depth, then adjust once more before running your final pieces. With repeatable settings and consistent leather thickness, results become very predictable.
Setup Checklist and Practical Settings Guide
| Item to check | What to look for | If results are off |
|---|---|---|
| Die/plate alignment | Design sits square; no rocking | Re-seat die; add a stabilizing backing sheet |
| Backing pad condition | Flat, not gouged or overly compressed | Rotate/replace pad to restore even support |
| Stroke setting | Enough travel to complete the job without bottoming out harshly | Increase gradually for incomplete cuts; reduce if crushing occurs |
| Pressure setting | Uniform contact; consistent depth across the plate | Increase for light impressions; decrease if grain is distorted |
| Leather placement | No wrinkles; consistent thickness in the press area | Skive or re-position; avoid seams under the die edge |
Materials and Dies That Commonly Work Well
Safety and Maintenance Basics
For broader guarding principles and safe operation, review OSHA’s machine guarding requirements. If you care about responsible leather sourcing and industry transparency, the Leather Working Group (LWG) provides background on standards and auditing.
What to Expect in Real Use
Product Option Available Now
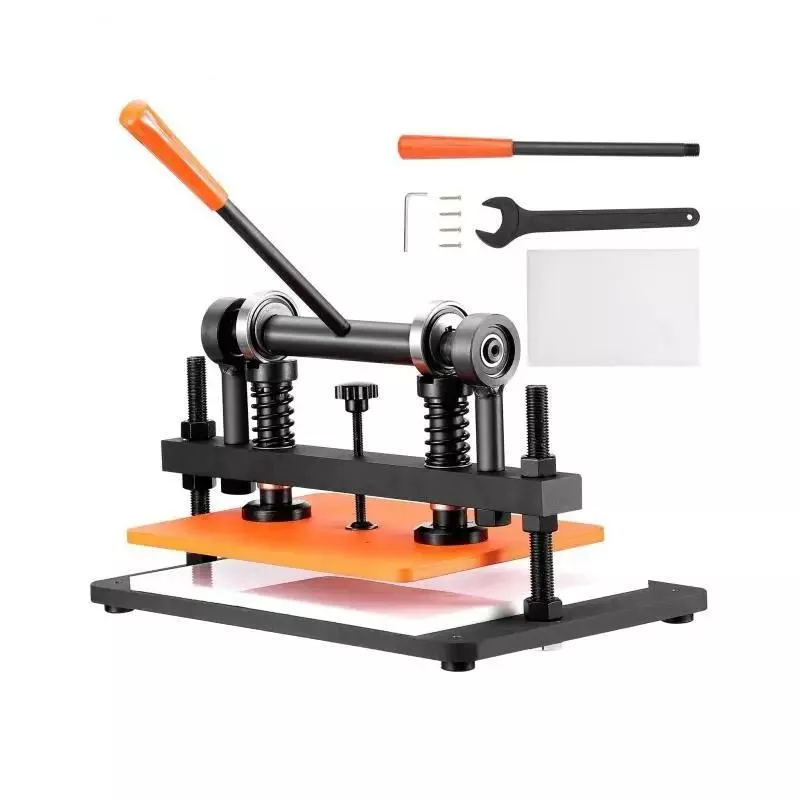
If you want a straightforward, adjustable press for studio work and small-batch production, the Leather Cutting & Embossing Machine – Manual Die Cutter with Adjustable Pressure Stroke is available now. Its adjustable controls help accommodate different leather thicknesses and die/plate setups so you can get consistent cuts and uniform impressions with less trial and error.
Other items available on the shop
- Women’s Summer Pleated Linen Tank Top
- Minimalist Loose Pleated Suit Pants
- Rectangular Tempered Glass Bathroom Vessel Sink with Waterfall Faucet
FAQ
Can this type of manual press both cut and emboss leather?
Yes. Cutting is typically done with a steel-rule die that slices through the leather, while embossing uses a plate to press a design into the surface; the same press can do both when the backing surface, pressure, and stroke are set appropriately.
How do adjustable pressure and stroke affect the result?
Pressure mainly determines whether a cut fully separates or an emboss reaches the intended depth, while stroke controls how far the press travels to complete the job. Too little pressure can leave incomplete cuts or faint impressions, and too much can crush grain or distort the design.
What should be used under the die to protect it and improve cut quality?
Use a flat cutting pad or suitable backing plate that supports the die evenly and cushions the cutting edge. If the pad is worn, gouged, or unevenly compressed, cuts can become ragged or incomplete in low-support areas.










Leave a comment